
I’ll admit, I was a little apprehensive about the Beenoskee before setting off. A few of the AllTrails reviews had mentioned a section where there is no defined trail to follow. The advice was essentially to make your own way across the mountainside, with some tough underfoot conditions along the way.
That immediately brought back memories of my Barrclashcame hike in Mayo. Navigating through gorse and long grass isn’t always enjoyable, as I know from this experience.
On that walk, the absence of a proper trail meant long stretches of pushing through thick grass and vegetation, with progress painfully slow at times. It turned what looked like a relatively straightforward mountain walk into a real slog.
So, reading the reviews of Beenoskee beforehand, I had one main concern: was this going to be Barrclashcame all over again?
Thankfully, it wasn’t. There is definitely a section where there is no proper trail to follow, and you’ll need to be comfortable navigating across open mountain. However, I found the going considerably easier than I had expected. It also only makes up a relatively small part of the 14km hike as you move upwards to the mountain ridge.
And once I reached the ridge, the walk really came into its own.
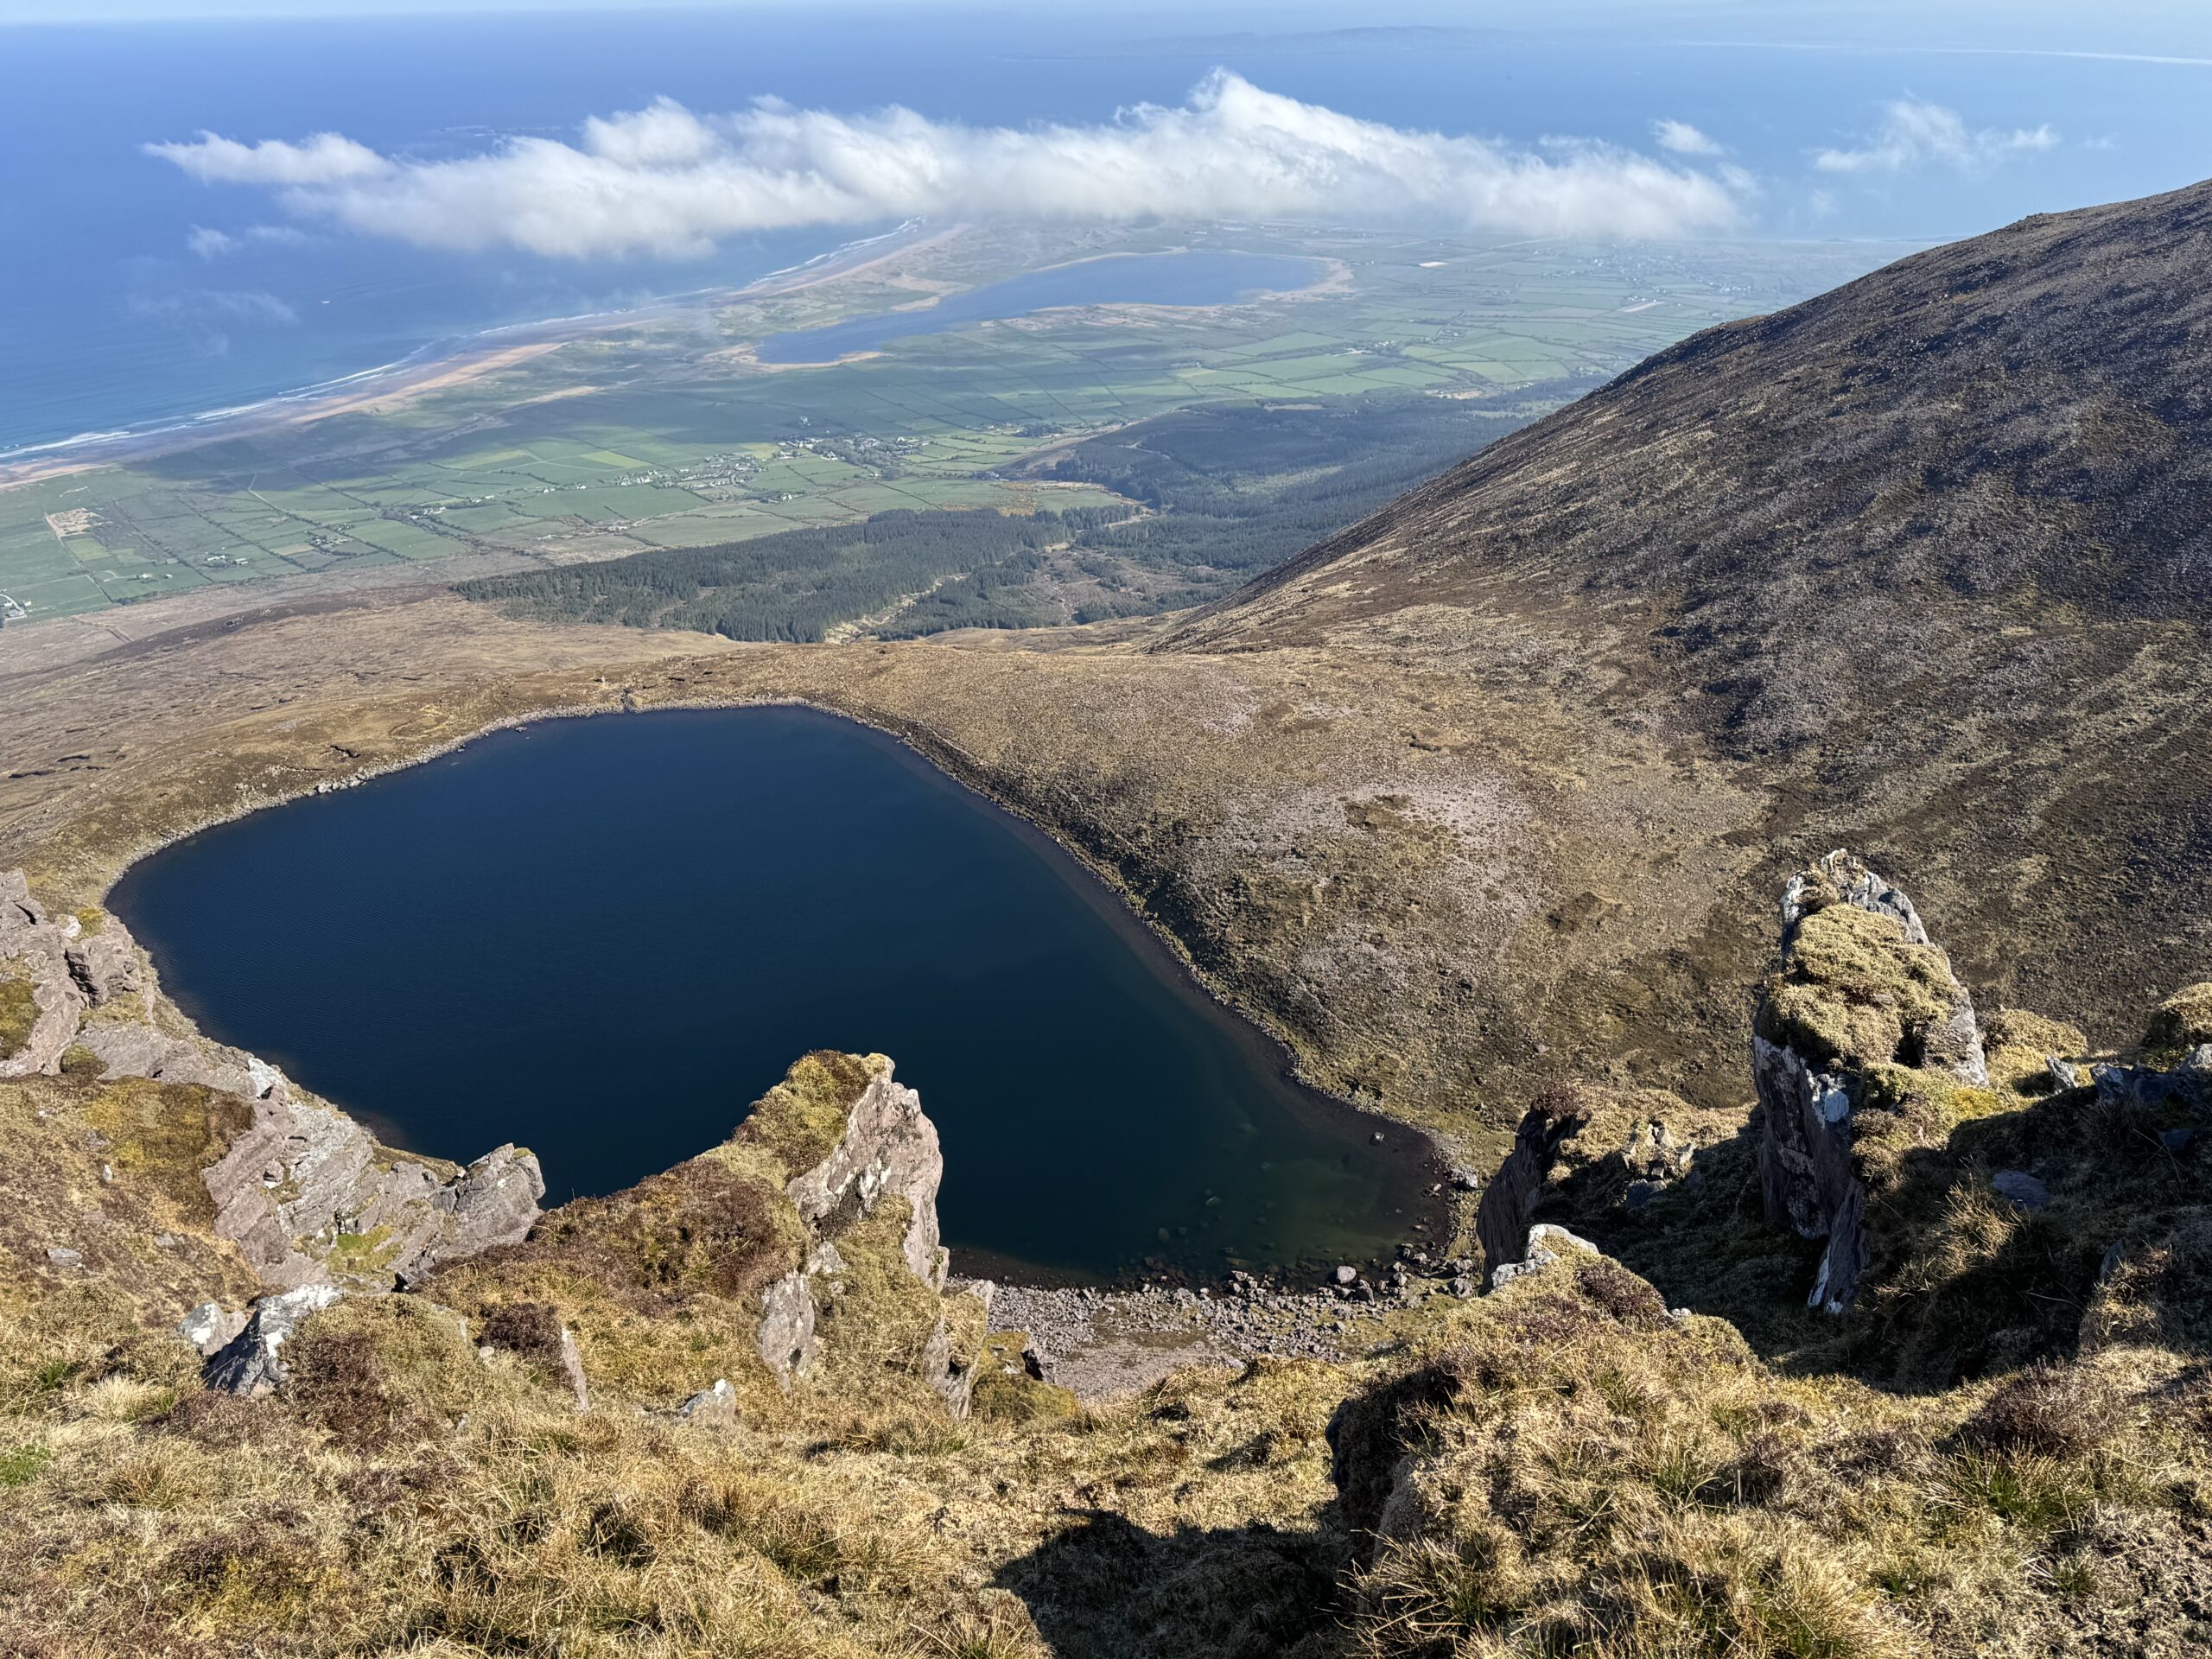
With incredible views down towards Glanteenassig Forest Park, Lough Acummeen sitting beneath the mountains and huge coastal views over Brandon Bay and the Maharees, this turned out to be a brilliant day in the mountains.
Beenoskee Hike – Quick Facts
- Distance: 14km
- Time: It took me 4.5 hours
- Highest Point: Beenoskee – 826m
- Total Ascent: 864m
- Route Type: Out and back
- Terrain: Mixture of forestry roads, rough mountain tracks, pathless mountain terrain and broad ridge walking.
- Difficulty: Hard. The long distance combined with steep elevation gains make this a tough but rewarding hike.
Beenoskee Hike Map
I used the below alltrails map when I completed the Beenoskee hike. You can check out full map details on the alltrails website here. The trail brings you through forestry for just over 3km, then over open mountainside to the lower sections of the mountain ridge. From there, I followed the high ground towards Stradbally Mountain and eventually on to the summit of Beenoskee.

Parking for the Beenoskee Hike
I parked at the start of the forestry road off the R560. There isn’t a designated car park here. Rather, it is just the junction of where the forestry road meets the main road. I pulled the car in as tightly as possible beside the ditch, making sure there was still plenty of space for other vehicles and that I wasn’t blocking anything. At a squeeze, you could fit one other car in here at the same time.
From there, the hike begins by following the forestry road.
The Forestry Road
The first 45 minutes or so of the walk are very straightforward. You simply follow the wide forestry road as it gradually winds its way uphill through the trees.
Underfoot it is firm and the gradient is mild. As such, I found it relatively easy going without anything particularly challenging to overcome in this section. It’s probably the least exciting part of the hike, but it gives you a gentle start before the proper mountain walking begins. And every so often, it offered up an occasional nice glimpse between the trees and out to sea.

Eventually, the forestry road reaches a gate at the edge of the trees. Once through the gate, you leave the forest behind and emerge onto the open mountainside. This is where things start to get a little more interesting.
A Slightly Confusing Turn After the Forest
Almost immediately after going through the gate, you reach a wide gravelly area. There is a very obvious track continuing straight ahead and, naturally enough, that was the one I initially followed. It isn’t exactly a wrong turn. The track makes a much wider loop around the hillside and would eventually bring you back towards where you want to go.

However, when I checked the AllTrails map, I could see that the route I wanted took a much more direct line and effectively cut out this loop. There is actually another, much less obvious track heading off to the left from the gravel area. I spotted this properly on my return journey and followed it back.
On the way up, however, I had already followed the obvious track for a while before realising what had happened. Rather than continuing around the full loop, I cut across a small section of rough ground and rejoined the AllTrails route.
If you’re following the same Beenoskee hike, this is therefore one section worth paying attention to. Don’t automatically follow the most obvious track straight ahead after the gate. Look for the less obvious track heading away to the left.
Across the Open Mountainside
Once I was back on the route, the rough mountain track was easy enough to follow. It continues across the open mountainside until a little after the 4 km mark. The turn off the trail comes after passing through a gate.


At that point, it was time to leave the track completely. I needed to aim for the lower side of the mountain ridge.
I turned right and started making my way uphill towards the ridge. This was the section I had been thinking about before the Beenoskee hike.
The reports were right. There wasn’t really a trail from this point onwards. You’re simply picking your own way across the mountainside and gradually gaining height. The good news however was that it was nowhere near as difficult as I had feared.
The ground was certainly rough, with heather, grass and plenty of rocks to negotiate, but I was still able to make steady progress. We had also enjoyed a prolonged spell of good weather before my hike, which undoubtedly helped. I imagine this section could feel quite different after a lot of rain when the ground is wetter and softer.
Most importantly for me, it was nothing like Barrclashcame. I wasn’t fighting through thick vegetation or having to battle for every metre of progress. I’d describe it as tough but manageable.
There might not have been a trail, but the objective was also very simple: keep gaining height until you reach the ridge.


Climbing to the Ridge
One of the advantages of this approach to Beenoskee is that you’re not attacking the steepest part of the mountain head-on. Instead, the route works its way gradually towards the ridge at a lower point.
Once I reached the ridge, everything became considerably easier. And the ridge was a real treat.
Following the Ridge
The ridge itself is broad and open rather than narrow or particularly exposed, and the walking became much more enjoyable after reaching it.
The best advice here is to make your way towards the fence. This was also where the views really began to open up.

Looking down towards Glanteenassig Forest Park, I could see the forest, lakes and surrounding cliffs spread out below me.Turn in the other direction and the landscape was completely different, with huge views stretching towards Brandon Bay, Lough Gill and the Maharees. Luckily, I had picked a clear day for the hike and could see for miles.

After spending the first part of the day wondering how difficult the off-trail section might be, this was probably my favourite part of the walk: broad mountain terrain, straightforward navigation and brilliant views in almost every direction.
An Optional Detour to Stradbally Mountain
Before heading for Beenoskee itself, I continued along the ridge towards Stradbally Mountain. There is also a prominent cairn on the mountainside before reaching the actual summit of Stradbally Mountain, and this makes a fantastic viewpoint in its own right. From here, you get superb views towards the coast and Brandon Bay.

I then continued as far as the summit of Stradbally Mountain itself. The little detour provided me with a great perspective of Beenoskee. Looking across from this side, you can properly see the shape of the mountain and the much steeper ground dropping away beneath it. It also gives you a good idea of exactly where you’re heading next.

From Stradbally Mountain to Beenoskee
Another fence runs between Stradbally Mountain and Beenoskee, which makes the next section particularly straightforward to navigate. I simply followed it towards Beenoskee. One of the views I was particularly looking forward to was Lough Acummeen, which sits dramatically beneath the ridge between the mountains.
I spent a while trying to find the perfect angle for a photograph as I made my way across. Eventually, I found it. Lough Acummeen was sitting directly below the ridge, with Brandon Bay and the coastline stretching away behind it.
It was one of my favourite views of the entire hike.

The Final Climb to Beenoskee
From here, getting to the top is straightforward enough. I just needed to continue upwards. It felt a little steep but manageable. The terrain became a little rockier as I gained height, but I didn’t find the final climb particularly difficult.
The views towards Lough Acummeen also get better and better as I climbed. Before long, I reached the summit of Beenoskee at 826 metres.
Beenoskee is the highest of the mountains in the Central Dingle group, and on a clear day its position gives you an incredible combination of mountain and coastal scenery.


The Descent from Beenoskee
For the descent, I didn’t retrace my outward line exactly. Instead, I took a slightly wider arc across the mountainside. I wanted to maximise the views across Glanteenassig Forest Park.

Eventually, I curved back towards my original line. From there, it was simply a case of retracing my steps.
I followed the broad ridge back, dropped away from the high ground and made my way down towards the rough mountain track.
Once back on the track, the navigation became straightforward again.
I followed it towards the forest, this time using the less obvious track that I should have taken on the way up, passed back through the gate and returned to the forestry road.
Then it was an easy final walk back to the car.
How Difficult Is the Beenoskee Hike?
I’d definitely class this as a challenging mountain walk. At 14km with 864 metres of ascent, there is plenty of climbing involved. However, I didn’t find any particular section technically difficult. Plus the navigation proved straightforward enough.
You just need to be comfortable making your own way across open mountain terrain towards the ridge. On the clear, dry day I had, this was considerably easier than I had initially worried about
In poor visibility, after prolonged rain or in strong winds, I think it would be a very different walk.
Glanteenassig Forest Park
Glanteenassig Forest Park is a major feature throughout this hike. The park covers more than 450 hectares of woodland, mountain, lakes and peatland, sitting within a sheltered valley surrounded by dramatic mountain scenery.
Glanteenassig is also worth visiting in its own right. Coillte has three marked trails within the park, including the River Trail, the short Lough Slat walk and the Lough Caum Loop. The latter sits directly beneath Stradbally Mountain and Beenoskee.
From Beenoskee and the surrounding ridge, you get a completely different perspective on it.

Rather than walking among the trees and lakes, you’re looking down across the entire landscape from high above, with the lakes tucked beneath the cliffs and the forest stretching across the valley floor.
Is the Beenoskee Hike Worth Doing?
Definitely. I started the hike slightly worried that the pathless section might be a tough slog. Instead, I found that section quite manageable, particularly in the dry conditions I had.
Once I reached the ridge, the walk became something completely different.
The views down into Glanteenassig Forest Park are superb, the coastal views towards Brandon Bay are fab. As is the view of Lough Acummeen sitting beneath the high ridge of the mountain. So all in all, well worth the 4 or 5 hours of hiking!